Pokemon are cute and colorful creatures. They come in various shapes, sizes, and types, each with unique personalities and abilities. If you love Pokemon and want to learn how to draw them, this guide is for you! In today’s post, you will learn two Pokemon Drawing: Pikachu and Charizard.
Pokemon Drawing: Pikachu
Pikachu is one of the most recognizable and beloved Pokemon of all time. He is loyal to Ash, the main protagonist of the Pokemon anime series. He is also the mascot of the Pokemon franchise and has appeared in many games, movies, merchandise, and spin-offs.
To draw Pikachu, you will need a pencil, an eraser, paper, and colored pencils or markers. You can also use a ruler or a compass to help you draw circles and lines more accurately.
Here are the steps to Pokemon Drawing Pikachu:
Step 1: Draw a circle and make it four sections to outline Pikachu’s head.
Sketch a large circle, then lightly mark a vertical line down the center of the circle. Mark a flat line just above the center point of the vertical line so the head sections are smaller than the bottom ones.
These lines will help you place the features of Pikachu’s face later.
Step 2: Draw long, pointed ears on top of the head.
Draw two curved lines that start from the top sections of the circle and extend beyond it. Make sure they are symmetrical and pointy at the ends. The ears should be about as long as the circle’s diameter.
Step 3: Draw Pikachu’s round cheeks and chin at the bottom of the head.
Draw two small circles on either side of the vertical line near the bottom section of the circle. These will be Pikachu’s cheeks. Then, draw a curved line connecting the cheek circles’ bottoms to form Pikachu’s chin.
Step 4: Add the ear and cheek markings.
Draw two small triangles inside each ear, near the tips. These are Pikachu’s black ear markings. Then, draw two small ovals inside each cheek circle. These are Pikachu’s red cheek markings.
Step 5: Draw the eyes on the horizontal line running through the circle.
Draw two oval shapes on either side of the vertical line, slightly above the horizontal line. These will be Pikachu’s eyes. Make sure they are symmetrical and have some space between them. Then, mark two smaller circles inside each eye to make pupils.
Step 6: Draw the nose and mouth below the eyes.
Draw a small triangle below the horizontal line between the eyes. This will be Pikachu’s nose. Then, draw a curved line below the nose that extends to both sides of the face. This will be Pikachu’s mouth. You can also add a small tongue inside the mouth if you want.
Step 7: Erase the guidelines and outline your drawing.
Use an eraser to carefully erase the circle and lines that you used as guides for drawing Pikachu’s head. Then, use a darker pencil or a pen to trace over your drawing and make it more defined.
Step 8: Color your drawing.
Use yellow for Pikachu’s body, black for his ear markings and pupils, red for his cheek markings and tongue, brown for his nose, and pink for his mouth.

You have just drawn Pikachu! Congratulations!
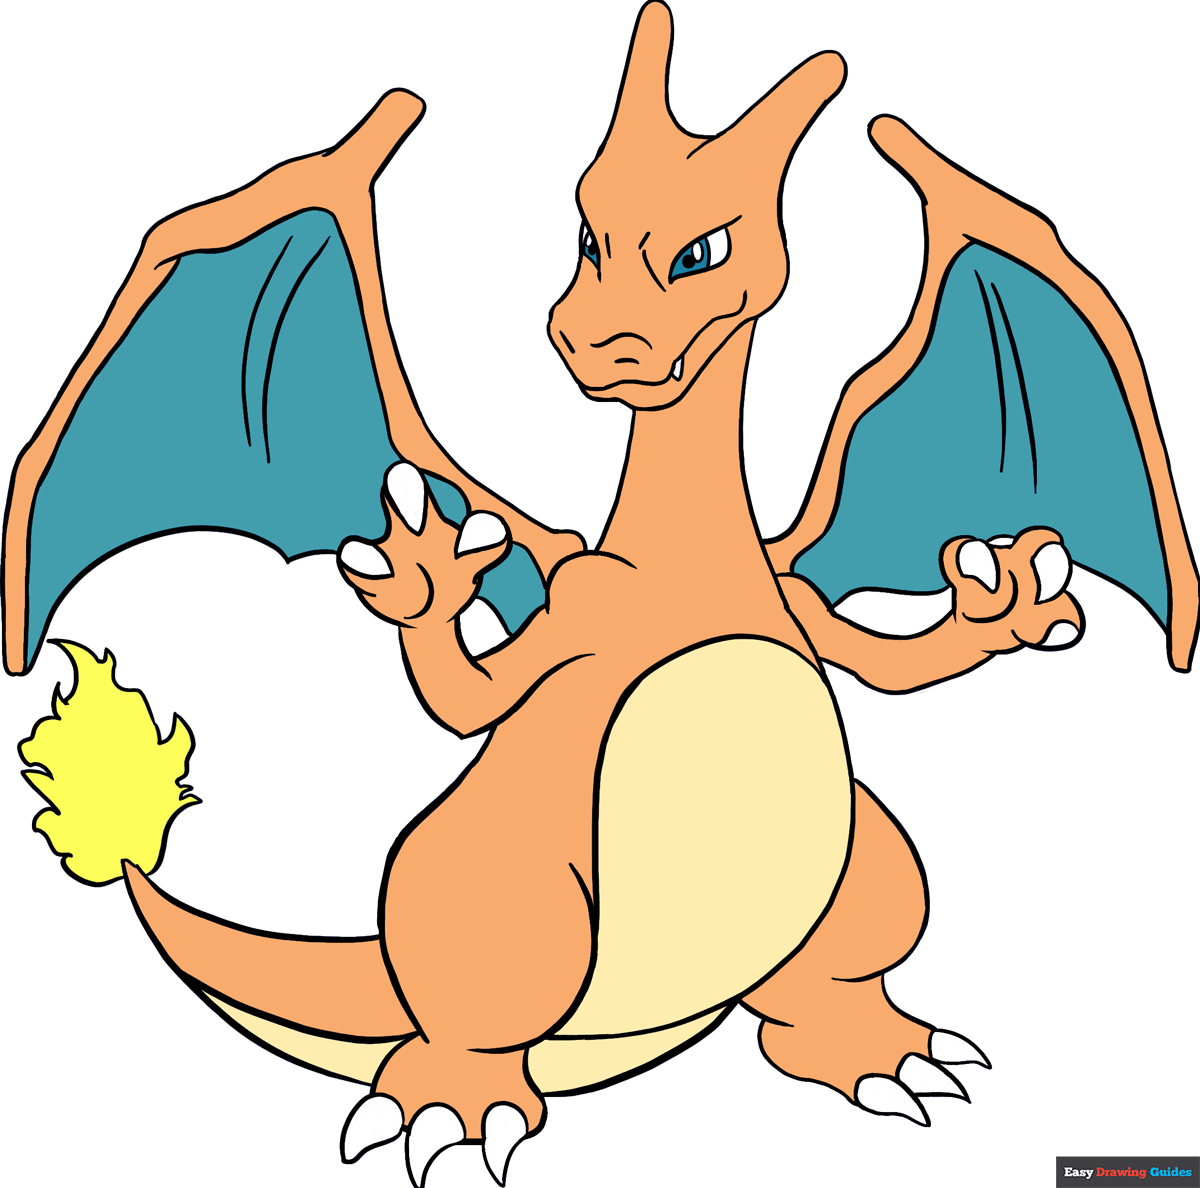
Pokemon Drawing: Charizard
Charizard is another popular and powerful Pokemon featured in many games, movies, merchandise, and spin-offs. He is one of Ash Ketchum’s strongest Pokemon in the anime series and can evolve from Charmeleon with enough experience. He is also one of the three starter Pokemon that players can choose from in Pokemon Red and Blue.
To draw Charizard, you will need a pencil, an eraser, paper, and colored pencils or markers. You can also use a ruler or a compass to help you draw circles and lines more accurately.
Here are the steps to Pokemon Drawing Charizard:
Step 1: Draw two circles for Charizard’s head and body.
Sketch two circles on your paper where you’d like Charizard’s head and body to be. The circle for his head should be smaller than his body’s. They should also overlap slightly.
These circles will help you shape Charizard’s head and body later.
Step 2: Draw his wing and mark the limb lines for the arm, hands, legs, and tail.
Draw a curved line that starts from the top of the body circle and extends beyond it. This will be the outline of Charizard’s wing. Then, draw four lines from the body circle for his limbs. The lines for his arms should be shorter than the ones for his legs. The line for his tail should be long and curved.
These lines will help you place Charizard’s limbs and tail later.
Step 3: Draw the shape of his open mouth, including his snout and bottom jaw.
Draw a curved line that starts from the bottom of the head circle and goes up to the top. This will be Charizard’s snout. Then, draw another curved line that starts from the end of the snout and goes down to the bottom of the head circle. This will be Charizard’s bottom jaw. Leave some space between the snout and the jaw for his mouth.
Step 4: Draw his horn, ears, eyes, nose, teeth, and tongue.
Draw a small triangle on top of Charizard’s head for his horn. Then, draw two small triangles on either side of his head for his ears. Draw two oval shapes on his snout for his eyes. Mark a small dot on his snout for his nose. Then, Draw some sharp teeth along his jawline for his teeth. Draw a curved line inside his mouth for his tongue.
Step 5: Draw his neck, chest, belly, and back.
Draw a curved line that connects the bottom of Charizard’s head to the top of his body circle. This will be his neck. Then, draw another curved line that connects the bottom of his body circle to the top of his tail line. This will be his back. Draw two more curved lines inside his body circle for his chest and belly.
Step 6: Draw his arms, hands, legs, feet, and claws.
Draw two oval shapes at the end of each arm line for Charizard’s hands. Make three fingers on each hand and add some claws at the tips. Draw two oval shapes at the end of each leg line for Charizard’s feet. Draw three toes on each foot and add some claws at the tips.
Step 7: Draw his wing, tail, and flame.
Draw a curved line that connects the end of Charizard’s wing outline to the top of his back. This will be his wing bone. Then, draw smaller curved lines inside his wing outline for his wing membrane. Draw a pointed tip at the end of Charizard’s tail line for his tail tip. Then, draw some wavy lines around it for his flame.
Step 8: Erase the guidelines and outline your drawing.
Use an eraser to carefully erase the circles and lines you used to guide Charizard’s head and body. Then, use a darker pencil or a pen to trace over your drawing and make it more defined.
Step 9: Color your drawing.
Use orange for Charizard’s body, blue for his wing membrane, yellow for his chest and belly, black for his eyes and claws, red for his tongue and flame, and white for his teeth.
Tips and Tricks
Here are some tips and tricks on Pokemon Drawing:
– Use reference images or models to help you with your drawing. You can find many pictures of Pokemon online or in books, magazines, cards, toys, etc.
– Start with simple shapes and lines to sketch out the basic form of your Pokemon. You can also use circles, ovals, triangles, rectangles, etc.
– Add details and features gradually as you refine your sketch. You can also use smaller shapes and lines to draw eyes, ears, nose, mouth, horns, spikes, scales, fur, etc.
– Erase any unwanted or overlapping lines as you go along.
– Outline your drawing with a darker pencil or a pen to make it clearer and neat.
– Color your drawing with colored pencils or markers to make it more vibrant and realistic.
– Have fun and be creative!
Conclusion:
In conclusion, Pokemon drawing can be an enjoyable and rewarding hobby for people of all ages and skill levels. Whether you prefer sketching with pencil and paper or creating digital art on a tablet, there are many ways to express your creativity through Pokemon characters and designs. With over 800 Pokemon species spanning many generations, there is no shortage of inspiration for artists and fans. Pokemon drawing also allows you to be part of the broader fan community by sharing your creations online. For these reasons, Pokemon drawing will likely remain a popular artistic outlet for years.